Tuesday, April 29, 2014

CASology Week 93: Electric


It's time for another CASology challenge, and our cue word this week is ELECTRIC.  Fun, right?  I have enjoyed pulling out favorite older stamps that haven't seen much ink recently for my CASology cards, so today I pulled out Lighten Up and Chair-ished from PTI.  The cue word of ELECTRIC made me think of things that plug in, so I thought of a lamp.  

How about you?  What do you think of when you see the word ELECTRIC?    Have some fun with this cue word, and then please link up your creation on the CASology blog by Monday 5/5 at noon (CST).


I stamped a little scene using a chair, dog, and floor from Chair-ished, and a floor lamp from Lighten Up.  I sponged some Lemon Tart ink around the lamp shade--showing a warm glow from a lamp turned on.  In person, the yellow inked area is barely visible, but in the photo it is quite bright.

Since CASology is a Clean And Simple challenge, I thought it would be helpful to review some things to keep in mind when creating a CAS design:


1.  One main image
2.  Lots of open space (uncluttered)
3.  Limited layers & embellishments
4.  Quick & easy to recreate
 
You can see that my card meets all 4 criteria above.
 
So, what do you think of when you see the word ELECTRIC?
 
Check out the beautiful designs from the CASology Design Team members and see how they were inspired by ELECTRIC.  Then, please play along and link your creation to the CASology blog by Monday 5/5 at noon (CST).  

Don't forget to keep your card Clean and Simple.
 
 
http://casology.blogspot.com/

Joyce Mehrberg (that's me)

And our guest designer:  Harriet
 
Thanks for Visiting

Sunday, April 27, 2014

Make it Monday, Colour Me, Lawnscaping and More


I am trying to get caught up from my trip, and finally had a bit of time over the past few days to make a few cards.


First up are two cards I made using the technique at Make it Monday #161:  Watercolor Splats using the colors from Colour Me #17.   After applying my inks using my mini ink daubers, I painted water spots all over the paper.  I was too impatient to wait for it to dry, so used my heat gun to speed up the process.  I cut the Memory Box Prim Poppy out of the panel, and then filled the space in with a white die cut that I had completely coated with Wink of Stella.  My sentiment is from Verve, and I put a tiny rhinestone inside the flower that is the 'o' in Mother.


OK, can  you see where this is going....What to do with the poppie die cut from my water splatted base?  Yes, you are right--I just made another card that is the opposite of the first card.  I added a bunch more tiny little water splats just on the flowers.  My sentiment is stamped with Brilliance Lightning Black--one of my favorite specialty black inks--I just love how muted and shimmery it is.   I am linking this card up at this week's Simon Says Wednesday Keep it Clean and Simple.


I'll be linking both cards up at Make it Monday and Colour Me.


The challenge this week at Lawnscaping #80 is Mini.  How fun is that?  I love mini things.  I've got two mini projects to link up today.  First up is this little mini birthday card, that I am also linking up at this week's Seize the Birthday Anything Goes. 

I made a little envelope using my Envelope Punch Board and paper from MME Happy Day.  I used the same papers to paper piece a mini birthday card using  the Hippo Birdie.  I'm so in love with this little mini card and envelope, I don't know if I will ever be able to use it.


I have another mini project for Lawnscaping #80--a mini paper cube.  Hard to tell in this close up photo, but this cube is 2" by 2" by 2", and I bought it at Impress.


I stamped three sides with flowers from Penelope's Garden.


Last up is a card I started making last week for Make it Monday, but did not finish it in time to enter.  I used the stamping and embossing on die cuts technique show in the video here.  I am entering this card at Simon Says Wednesday Keep it Clean and Simple and Simply Create Too Challenge #60:  Stack em Up.  I stamped and embossed the flowers from In Bloom before die cutting them.  It did make it much easier to emboss.  I used my new Background Basics Art Deco in Soft Stone and Spring Moss for the background.  That stamp is really easy to line up.


Well, that's it for me today.  


Thanks for Visiting

Friday, April 25, 2014

PTI Blog Hop April 2014


I have a funny story about my blog hop card this month.  I saw that the theme was Embroidered inspiration, so I pulled out my Embroidered Elegance stamp set and made my card, inspired by Maile's post here on divided panels.


After I made the card, I realized that the stamp set is called Embellished Elegance, not Embroidered Elegance.  Oh, well.  It is still what I was inspired to make after seeing the beautiful inspiration photo, and I hope that is all that counts.

I do have another idea for this blog hop, and will possibly pop back in later in the day, if I can find the time to pull it off.


I am also linking up at this week's CASology challenge where the cue word is Garden (and I am on the DT!!).  There is still time for you to play along.  There is even a prize this week.  Cathy Parlitsis from Stamps and Scrapbooks is offering this week's winner a free spot in the online Occasions 2014 Online Paper Crafting Class.


Thanks for Visiting

Thursday, April 24, 2014

Guest Designing for Top Dog Dies


Hello friends--Yes, you read that title right.  A while back, I was contacted by Top Dog Dies to see if I would like to be a Guest Designer for some of their dies.  Of course, I said yes, and they sent me some very fun dies to play around with.  

Top Dog Dies is a new online store that offers their own brand of wafer-thin and steel-rule dies, along with dies from brands you already know and trust, including My Favorite Things, Lawn Fawn, Taylored Expressions. Savvy Stamps and Cheery Lynn Designs. Top Dog Dies is also the leading U.S. retailer for Tattered Lace, a new line of intricate dies designed by British designer Stephanie Weightman.

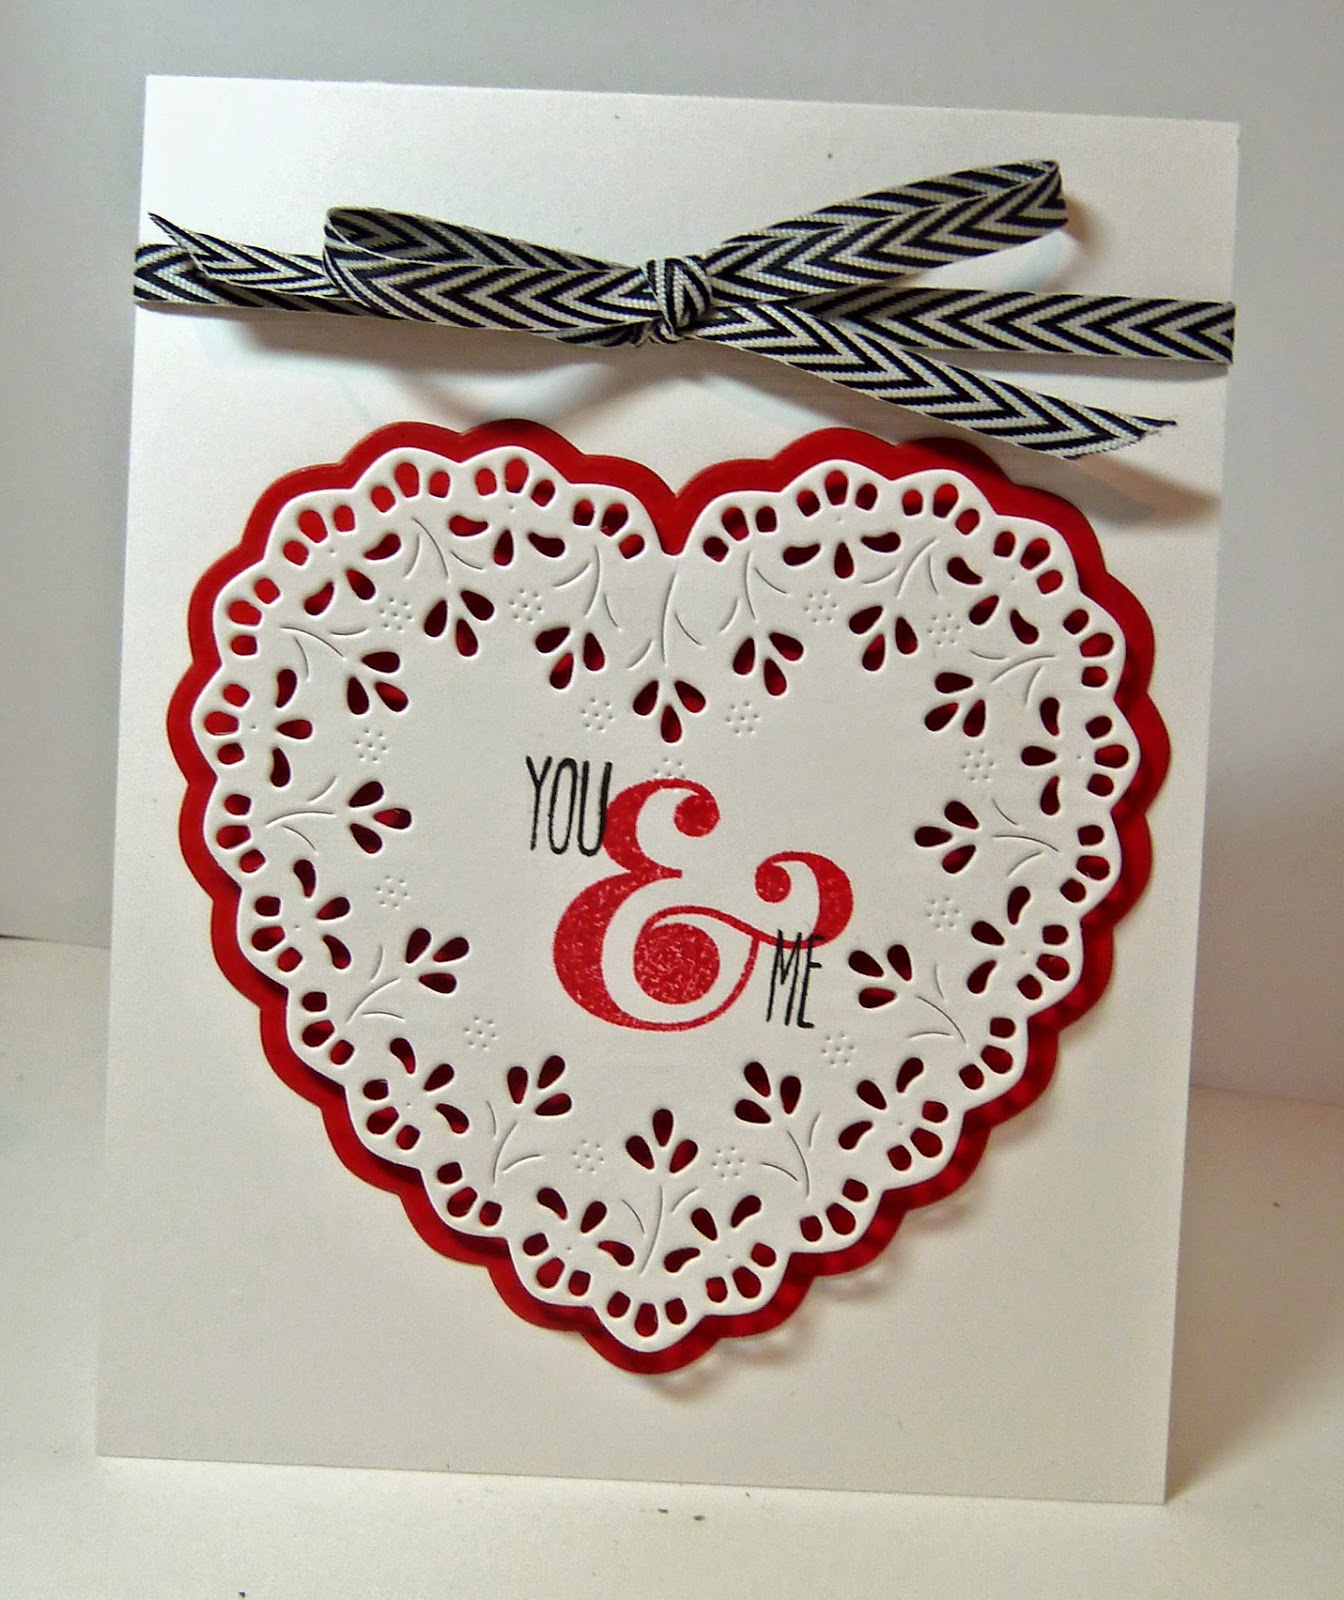
Today I am sharing some projects I made with the Heart Doily Die.  This is a set of two dies, as you can see below.


I made 4 projects with these dies, and could have played a lot more, if those pesky kids of mine did not want to be picked up from school and fed dinner.


First up is a valentine card.  I used the larger die to cut a base of Pure Poppy, and cut the smaller, more detailed heart out of white card stock.  I stamped the sentiment, from PTI Grand Ampersand, in Pure Poppy and Versafine Onyx Black.  I used foam tape to adhere the two hearts together, and then adhered it to a white card base, topped off by a bow.


Next, some sweet treats for my lucky Valentine.  I created die cut stacked hearts the same as above, only using some patterned paper.  I adhered this to a little treat bag that I created using some papers I had on hand from an old 12X12 Valentine Pad and my Gift Bag Punch Board.


My next project is a shaped mini card. 


I used the larger die to cut a card base.  I placed my die over the fold of a scored piece of white card stock.  You can see that the die will overlap a little bit on the left, so that the two sides will stay together.

Then, I cut another large heart from white card stock, and then impressed that die cut heart with the smaller die.  So, I used the more detailed die as an impression plate, rather than a die.  I used the same sandwich I use for my PTI Impression plates, including the rubber mats.

I stamped a sentiment from Verve in the center of that impressed heart piece using Raspberry Fizz ink, popped on a few sequins, and attached that die cut heart to my heart shaped card base.

My last project involves a technique I learned during the online card class I took a few weeks back.  


I took a 4 1/4 by 5 1/2 piece of computer paper and die cut the largest heart out of the center.  Then, I used temporary adhesive to attach the negative space to my card front panel.  I stamped around the entire heart shape, making sure to have all my stamped images partly on the mask and partly on the front panel. 


This is what the mask looked like when I removed it.  You can see what was left on the card front.  I used stamps from Ruby Rose and Ruby Rose Reprise and a sentiment from Bigger Blooms.  Then, I impressed that panel with the Stitching Impression  Plate and used foam tape to attach it to  my card base.


Top Dog Dies is doing a guest designer giveaway for the whole month of April.  The winner will receive $50 worth of exclusive dies from Top Dog Dies (their choice!). Click here to enter the giveaway.  

I have had a lot of fun playing with these new Top Dog Dies.  Stay tuned over the next two weeks--I'll have more projects to share from some other Top Dog Dies.


Thanks for Visiting

Tuesday, April 22, 2014

CASology Week 92: Garden


It's time for another CASology challenge, and our cue word this week is GARDEN.  My true confession today is that I have two black thumbs.  I cannot grow or take care of any sort of plant, and I have come to terms with that.  I have a gardener who takes care of the outside of my house and lots of silk and plastic fake plants and flowers inside.  But, as terrible as I am with real flowers, I just adore flower stamps and dies.  In fact, you could say that I have quite a garden in my stamp baskets.  So, for this challenge, I pulled out one of my older flower stamps and stamped a sweet little flower garden scene.

How about you?  What do you think of when you see the word GARDEN?  Do you like to garden?  What do you grow?  Have some fun with this cue word, and then please link up your creation on the CASology blog by Monday 4/28 at noon (CST).


I stamped one of my favorite images from Botanical Silhouettes using SU Real Red and Pear Pizzazz.  I grounded my garden with a thin strip of Pear Pizzazz.  I'm running low on Sympathy cards, so I used the 'with sympathy' sentiment from the same set, tucking it into one of the spaces between the flowers.  I set that panel on a standard sized card base using foam tape, and added a few black enamel dots.

Since CASology is a Clean And Simple challenge, I thought it would be helpful to review some things to keep in mind when creating a CAS design:

1.  One main image
2.  Lots of open space (uncluttered)
3.  Limited layers & embellishments
4.  Quick & easy to recreate
 
You can see that my card meets all 4 criteria above.
 
So, what do you think of when you see the word GARDEN?
 
Check out the beautiful designs from the CASology Design Team members and see how they were inspired by GARDEN.  Then, please play along and link your creation to the CASology blog by Monday 4/28 at noon (CST).  

Don't forget to keep your card Clean and Simple.
 

Monday, April 21, 2014

ColourQ and Retro Sketches


Hello friends.  I am finally back from my trip.  It was really wonderful to get to spend the entire week with only my oldest daughter, and  as long as I didn't think too much about what we were doing (i.e. finding her a college thousands of miles away from home), I remained in good spirits.  Of course, I was itching to get into my craft room, and so I found a few moments between laundry and getting the house put back together to make this card.

I made a quick card for this week's ColourQ cQc #237 and Retro Sketches rs#111--actually broke out a new die that was waiting for me in the mail pile--Vespertine Blossoms by Memory Box.  I'm keeping this super short because I need to get dinner going and the ColourQ challenge is almost ending.


I hope to spend some time meandering around blog land tomorrow (just like Anita), and catching up on everything I missed last week.

Thanks for Visiting

Thursday, April 17, 2014

Four-of-a-Kind (April 2014)


Ever since we changed Four-of-a-Kind from a monthly kit to a quarterly kit, it seems like forever between posts.  But, the April posting date is here, and so I am very excited to show what I made with Kim's kit, and to see what every one else did with their kits, too.  Our hostess this month was Kim, and she sent a wonderful kit, filled with all things coffee and tea.  I had such fun making my cards this month.  I consider myself lucky because I got the self-assembling kit this time.  My cards practically made themselves.

Here is a picture of the kit Kim sent:


I have 6 cards, so I will get right to the pictures.

I think this one is my favorite.  I coated the entire coffee cup in a thick layer of Crackle Glossy Accents.


This is my other favorite.  I love the font of the big die cut 'hello' and the patterned paper on the left is my favorite of the bunch.


Well, that's it for me.  I cannot wait to see what the other four did with their kits.  This is a scheduled post, as I am traveling with my daughter at the moment.  I'll need to wait just a few days until I get home. 

Here is a link to my pinterest board where I pin everyone's Four-of-a-Kind creations. 


The other three members of Four-of-a-Kind are:

Cathy Weber:  Empty Nest Crafter
Kim Heggins:  Cupcakes, Cards and Kim
Renee Lynch:  It's A Patchwork Life
 
Special Guest Designer:  Tracey:  In My Creative Opinion
 
Please stop by their blogs, if you haven't been there already, and see what they have created for their April Four-of-a-Kind projects.  


Thanks for Visiting
Related Posts Plugin for WordPress, Blogger...