Showing posts with label Text Die. Show all posts

Sunday, November 16, 2014

Sunday Wrap Up


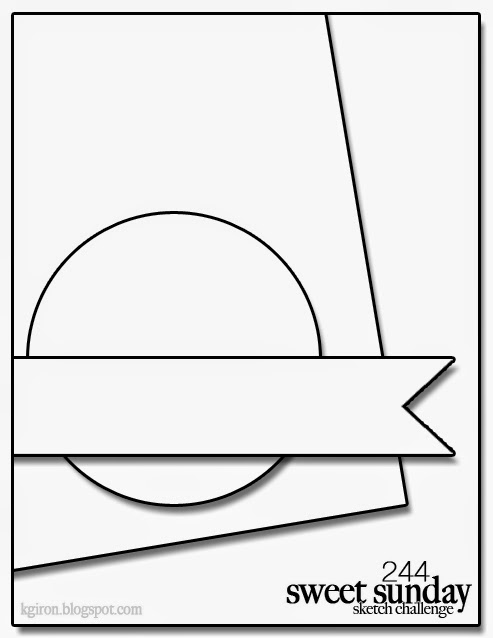
Happy Sunday everyone.  I'm here to post several cards I have made over the past day or so.  First up is a card that uses the sketch at Sweet Sunday Sketch along with a fabulous bird die that I completely forgot that I had.  Once I saw the bird in my box of dies, I knew I had to make a card or two with this die.


I just love the contrast of white and red with that bird, and decided to make another similar card.


My next card is inspired by this photo at Festive Friday, and I was also heavily influenced by Ardyth's inspiration card  for this challenge.


I'm still creating for the Caring Hearts card drive, and there is still time, if you are thinking you would like to join in.


Now, because I can't seem to stop making ombres to play along at Make it Monday #180, I have three more cards to enter into this challenge. 

I am also entering this card at Seize the Birthday Anything goes and Addicted to Stamps Anything Goes.


I sort of cased myself with this next card.


Last up is a card for one of my favorite sketch challenges, CAS(E) this Sketch, where they are celebrating 100 sketches.


That's it for me today.  I've been horribly behind in making my blogland visits and comments, so I am off to mosey around and see what you've all been up to.


Thanks for Visiting

Thursday, May 22, 2014

Congratulations and Birthday Cards


I have a card for this week's Make it Monday #165:  Artsy Watercolor Backgrounds.  Watercoloring is so trendy now, and I really like how easy it is.  I used some Ranger water color paper and Mum's the Word stamps in Berry Sorbet, Lavender Moon, Harvest Gold and Simply Chartreuse ink.  I stamped my sentiment in Versafine Onyx Black after everything was dry.  I am also entering this card at Less is More #172, where the theme is Flowers, and Simon Says Monday where the challenge is Botanical.


I have 4 cards using the color scheme at this week's ColourQ cQc #242.  What--why 4 cards?  Well, I wanted to play around with these colors first using Copic markers and then distress inks.  I used my PTI Text Block Birthday die, and because I cannot bear to waste a die cut, each method ends up with two cards.

First up are my cards using Distress Inks.  I used 4 colors and sponged them on a piece of white card stock, blending where the colors met.  Then, I ran that piece through my Xyron machine, before cutting it with the Text Block Die.  I also took a plain piece of white card stock, ran it through the Xyron machine and then cut it with the die.  

The cards are made by adhering the die cut sentiment piece to a card base, and then filling in the bits from one die cut on to the card base with the other die cut.


I used a similar method for my cards using Copic markers.  I used 4 markers and colored a piece of white card stock with them, overlapping the colors where they met.  Then, I ran that piece through my Xyron machine, before cutting it with the Text Block Die.  I also took a plain piece of white card stock, ran it through the Xyron machine and then cut it with the die.  


 It is very hard to tell the difference between the two sets of cards in these photos, but it is a little more obvious in person.  The ones with distress inks have more blended flow between the colors.  It was fun to play around with these colors, and now I have 4 birthday cards to add to my stash.


In this side by side comparison, you can see the Copic card on the left and the Distress ink card on the right.  If you look closely, you can see how the colors are blended where they meet.

I am also entering these cards at Seize the Birthday--(no toppings--anything goes).


Thanks for Visiting

Sunday, March 16, 2014

Online Class Homework, Colour Me and Bonus


I did a little homework this weekend.  First up uses a masking technique taught via picture tutorial on day 4 by our very own Kara.  It was so exciting to see Kara featured as a class instructor, and she showed us some masking tricks.  

I cut a mask out of an MFT die, and temporarily adhered it to the middle of my card front.  I used Aqua Mist, Ocean Tides, Hawaiian Shores, New Leaf and Ripe Avocado inks to stamp a pattern of leaves around the mask--partly on and partly off.  When I removed the mask, I had that beautiful white center, and I stamped a sentiment from Say it With Style using Brilliance Lightning Black ink.  You cannot see in the picture, but the ink has a bit of gold shimmer in it.


My next card uses the video tutorial by Laura Bassen--I used post it notes tape to mask off a frame around the card, stamped the center with the Crackle background stamp, added a sentiment from MFT and then thoughtfully/randomly stamped happy colored polka dots within the frame.


I had an idea to use the Text Block Birthday stamp in this week's Colour Me colors.  I ran a piece of Enchanted Evening and Canyon Clay paper through the Xyron machine and then die cut each with the Text Block die.  Then, I was able to make two cards that are mirror images of each other.

I stamped the kraft card base with Versamark and a Distressed Corduroy stamp from IO.


I impressed the kraft card base with the Woodgrain IP for the next card:


So, now I have two masculine birthday cards ready to go.


Some of the blue bits got lost somehow, as I was pulling the adhesive off the die cut, so I had to cut another blue piece to get the little pieces.  I was able to make a 3rd card with the extra blue die cut--my bonus card.  Rather than cut another piece out of red, thus perpetuating this endless loop, I just adhered the blue die cut to a piece of red, trimmed it down to size, and then adhered it with foam tape to a piece of Simple Stories plaid patterned paper.


That's it for today.  I'm looking forward to seeing what is in store in the classroom tomorrow.


Thanks for Visiting

Saturday, March 15, 2014

ColourQ, Make it Monday and Simon Says


 I took a break from my online card class homework yesterday to make this card for ColourQ cQc #232.  One of the 'colors' this week is newsprint.  How fun is that?  I used some SU newsprint paper to make some flowers using my new Button Stack dies.  Each newsprint flower has a black card stock button die cut underneath cut from some other button dies I have--they looked better with something behind them.  The leaves are from Waltzingmouse Simple Sprig.


My second card today is for this week's Make it Monday #155:  Create your own confetti with Papertrey Ink Dies and Simon Says Wednesday Mother's Day Special Girl.  I used the small numbers dies from the Hands of Time set to make a bunch of colorful number confetti.  I used that confetti in a shaker card that I will be sending my niece for her 16th birthday.  The card base as well as the Text Birthday Die cut use some silver shimmer paper from Michaels.   I have been surprised to see some really high quality papers at my local Michaels lately.


The confetti is cut from Limeade Ice, Raspberry Fizz, Lemon Tart, Harvest Gold, Orange Zest, Tropical Teal and SU Tempting Turquoise.  Here is a peek at that confetti.  It was probably the most time consuming part of the card because most of those tiny numbers had to be picked out of the dies--but I moved my die cut machine to my desk and cut while watch I watched my online craft clas videos.


Thanks for Visiting

Saturday, March 8, 2014

I'm Still Crafting


I've had lots of crafty time lately--yesterday because my girls got a ride home from school and today because I was keeping my oldest company while she did her homework and studied for her ACT.  I had to take a pause to clean up my mess and post what I have done so far.


First up is a little number for CAS-ual Fridays CFC129:  Shades of Gray.  I used Soft Stone and Smokey Shadow, and am also linking to Simon Says Stamp Monday Challenge where the theme is Tick Tock.  My dies are from PTI Hands of Time, and the sentiment is from 2012 Birthday Tags--that ink is Heidi Swapp Teal, on sale for 40% off at Michaels.  It's a really bright peacock blue and matches the enamel dots I had in my stash.  I added the blue and red to brighten the card up a little.


My next card is for this week's CAS(E) this Sketch CTS#67 and Simon Says Wednesday Challenge Tag It.   I got this Jane's Doodles set, Home Sweet Home, a while ago, but had not had a chance to ink it up yet.  I decided to paper piece everything with some SU paper, and used the Lil Inkers Love Tags for my focal point.  I impressed my card front with the Lil Inker Circles and Diamonds Cover Plate because I thought it looked like a homey quilt.


My next card is for ColourQ cQc #231, Little Tangles #32: Inside of the Card and Stamplorations Sketch #7.    It is my second time playing along with this sketch, but this time, I actually have Stamplorations stamps--Retro Mod Shapes.  My sentiment and card inside are from Neat & Tangled Party Dots.


I have two cards for this week's Make it Monday #154:  Color and Texture Tips for One Layer Cards.  My first card uses Stitches and Swirls and the Solid additions.  I embossed my Stitches stamps in gold, and then stamped over using the solids in Berry Sorbet, Summer Sunrise, Limeade Ice and Pure Poppy.  My sentiment was stamped in black, but apparently wasn't dry when I was embossing, because the gold stuck, and so my sentiment is gold too.


My next card was really quick to make.  I wanted to pull out some stamps I hadn't used in a while, and I used the Gallon/Quart/Pint rule for color, and stamped everything on top of something else.   Another sympathy card for my stash.


I think my favorite of the day are these next two.  I forgot that I had bought the Text Block Birthday die until I saw this card that Tracey posted this morning for Seize the Birthday.  I cased this card by Laura Bassen from the PTI release last month.  Laura used Copics, but I wanted to use water colors.  I took a 3X4 piece of cardstock and scribbled a few different shades of every color of the rainbow in stripes down the paper using Inktense Water Color Pencils.  Then, I wiped my water brush across the stripes.  After that dried, I ran it through my Xyron Machine (thanks, Kim) and then cut it with the Text Block Birthday Die.  I also cut a plain white piece of card stock after running it through the Xyron.  I adhered the white die cut to a white card base, and filled in the spaces from the colored sheet.  I'm entering these into the new challenge at Virginia's View #1 as well as Seize the Birthday.


I was left with a rainbow colored die cut, so I adhered that to another white card base, and had a super quick second card.


Here they are together.  I can't decide which I like best--but I do think that they are my favorite thing out of all I made today.


As you can imagine, I have another giant mess to clean up.  


Thanks for Visiting
Related Posts Plugin for WordPress, Blogger...