Showing posts with label Organization. Show all posts

Thursday, November 19, 2015

CASology Design Team Craft Space Tour


Hello, and welcome to my craft room.  I hope you have enjoyed the CASology Design Team Craft Space Tours.  I am the last stop on the tour.

The photo below is the view from the door looking into my room.  I am fortunate enough to have a  room of my own upstairs.  I use this room for all my crafting, as well as paying bills and anything else I need a computer for.  Do you see my crafting buddy?  Yes, that is him in the most comfortable chair in the house.

I had a large built in desk made years ago, with the idea that my daughters could sit on one side doing homework and I could sit on the other doing my own stuff, and we would have about 3 1/2 feet of desk space between us.  

You can still see my daughters' chairs, but they do not use my office much any more, so I have spread out more and more of my stuff across the desk.  The cabinet on the far side of my desk was originally intended so my girls could each have a place to stash their stuff in my office, and it is now filled with extras of every adhesive imaginable plus a couple of Xyron machines.


On the left side of the room, I've got some more built ins with a closet in between them.


Let's take a closer look at the left side.  I keep all my patterned paper pads there in baskets and bins. My patterned paper pads are organized by brand, and I keep all the scraps for each pad clipped together, and all the clipped scraps for a particular brand together in a zip lock stored in the back of each section.  It is pretty much impossible to use up a pad of paper using this method, no matter how often I use it.


The other side houses all my PTI sets that are in CD cases, white and cream paper, a few baskets of stamps in Tim Holtz folders, felt, buttons, and more.  If you want to see more about my stamp storage, please click here.


Ready for a peek into the closet?  

On the right side is lots of 12X12 paper left over from my brief foray into scrapbooking, SU stamps and wooden stamps.  Click here to see the post where I describe how I store my wooden stamps.  I store them in horizontal picture frames.


This is the middle section of the closet, and I have extras of all my PTI papers and patterns on top of the cubbies, and various other things like office supplies, ribbon, eyelets, etc. in the cubbies.  The left side of the closet is too messy to show, so we won't go there today.


Continuing around the room, this wall has a table where I keep my paper cutter, scoring board and die cutting stuff.  The most important thing on this side of the room is my super comfy chair and my best crafting buddy, Sherlock.


I keep all of my completed cards in bins under this table.  Click here to see the post where I describe how I organize and store my completed cards.

I store all my dies, impression plates, and embossing folders on the shelves right next to my Big Shot. Click here to see more detail on how I store and organize my dies.


Who is this handsome and furry guy, watching me make cards?


Continuing around the room, we come to my desk, where I have tidied up my work space just for you.  I have lots of things right at my finger tips--inks, markers, pens, scissors, glue, etc.


I have lots of coloring stuff right at hand, stored Jennifer McGuire-style.


Do you see that amazing ribbon rack on the wall?  Kim's husband Dwight made it for me, and Kim actually brought it down to San Diego to me on the plane.  Talk about great friends!  The rack is filled with ribbon and Washi tape I almost never use but love to look at.  Click here to see a little more on how I organize my inks.


I keep my most used stamps stored in Tim Holtz folders in baskets on the left side of my desk.  They are organized by topic and then by company.  


I like to use binders to help me keep track of things.  My most used binder is my sentiment binder.  I stamp every sentiment from every stamp set into this binder, and I organize it by type of sentiment.  It makes it easy to find the right sentiment for each card.


Here is an example from the 'Happy Birthday' section--kind of messy, but very functional.


Here is a quick peek at the binder where I keep samples of all my die cut words.


The last thing I will highlight is this wonderful cart from The Container store--I have a couple of full pieces of every color of card stock stored along with all my scraps in rainbow order in the top of this cart.  The bottom holds sequins, twine, embossing powders and other stuff.  Click here and here to see more about this cart.


Thanks for coming by to visit me in my craft room.  Happy Crafting!

Thursday, April 9, 2015

Happy Birthday and Organizing Some of My Inks


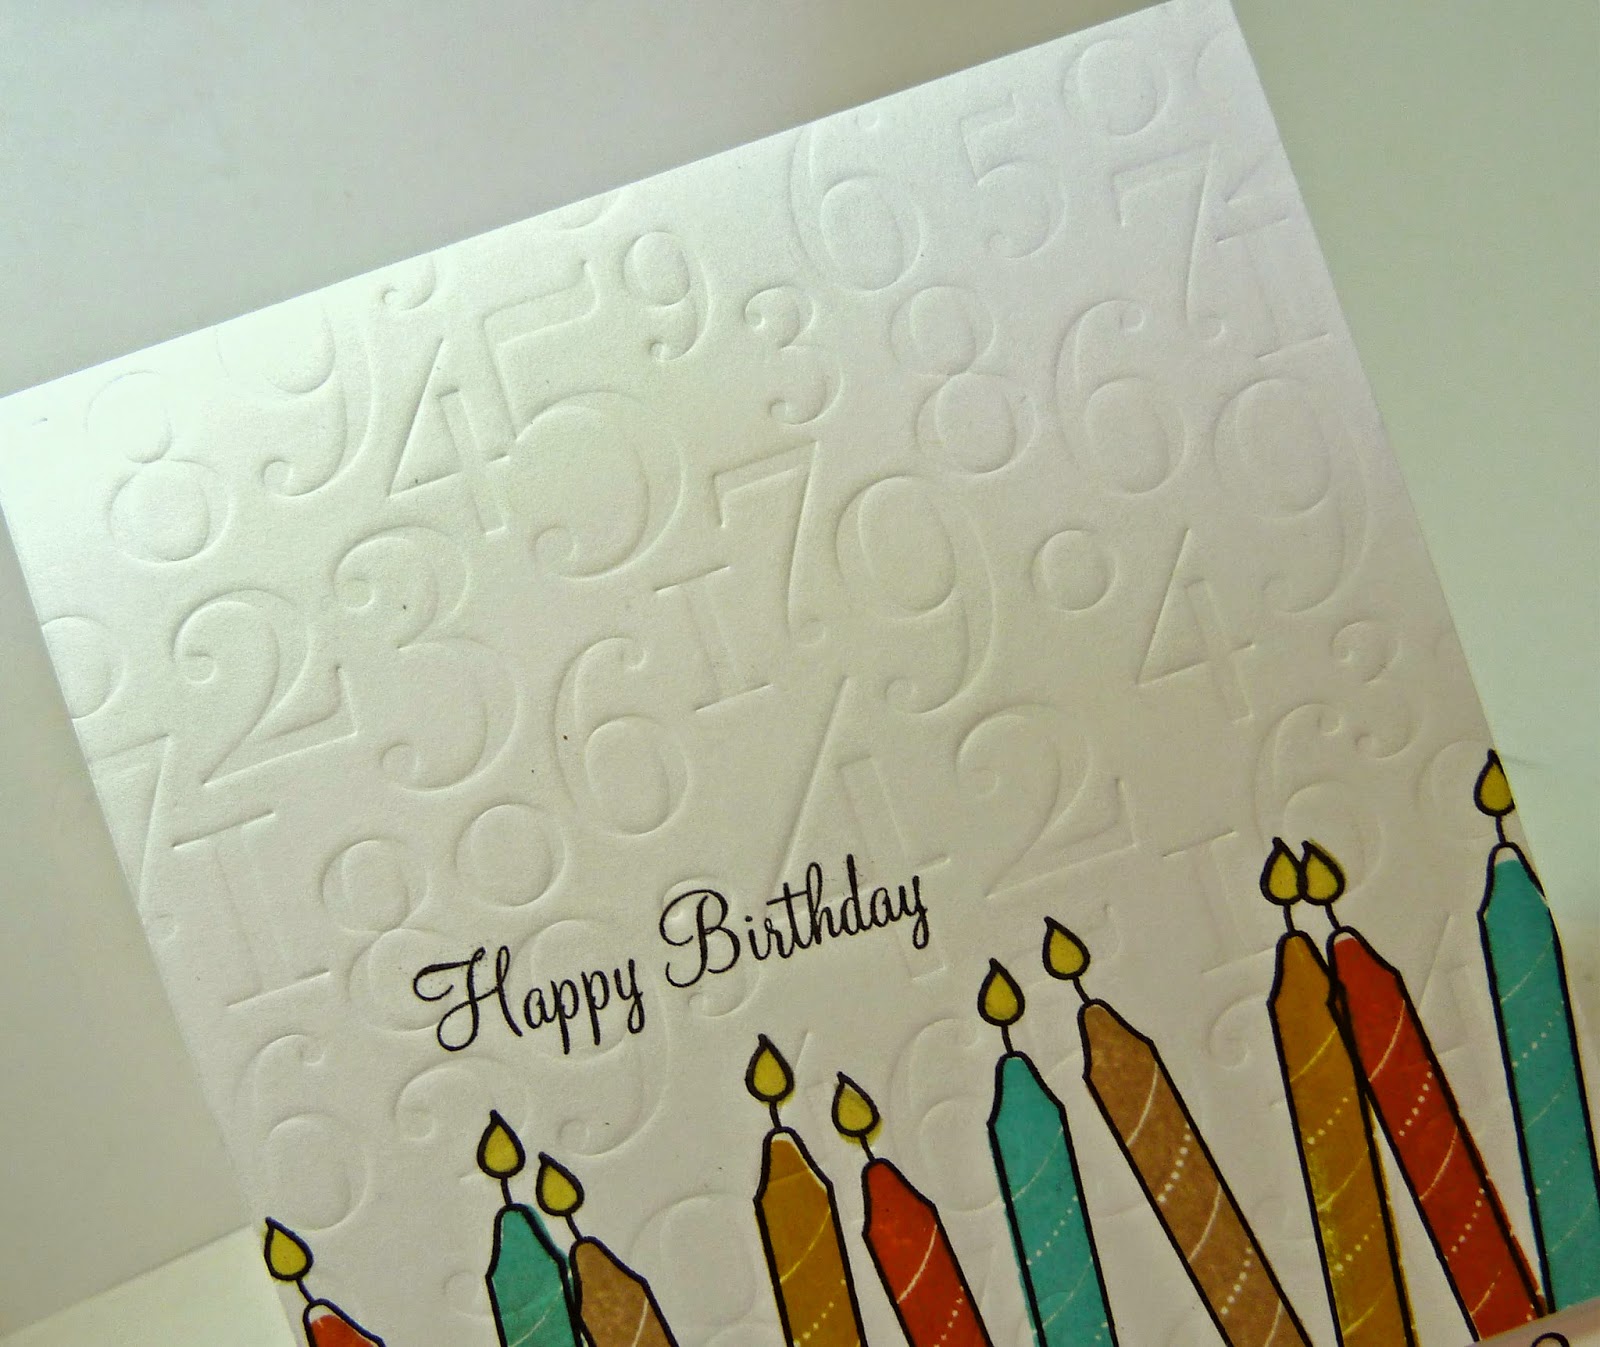
I have just one card to share today.  I used the colors from this week's ColourQ and was heavily influenced by Kim's inspiration card this week.  I had seen several folks use Birthday Wishes recently--Marybeth, and Rhonda, so I decided to use those candles for my card.  After stamping and embossing my card front, I cut a space for part of the sentiment.


Here is a close up of the embossing on the card front.  I am entering this card at CAS on Sunday #55: Numbers as well as Addicted to Stamps #139:  CAS.


I have been busy organizing some of my inks.  I bought these CD racks from Target that I saw people use as hanging ink pad holders, and decided to combine and organize my inks from Hero Arts, WPlus9, Simon Says Stamp and Heidi Swapp.


And, I created a ring of swatches, so I can see all of the colors together.


I hope that this will make it easier for me to see what ink colors I have and encourage me to reach for them more often.  Plus, I love how the swatches look--so pretty.


Thanks for Visiting

Wednesday, June 18, 2014

CASology 100 Challenges Celebration


I am so happy that I am being featured on the CASology blog as part of our 100 challenges celebration.  You can head over there to read all about me.  Go ahead....I'll wait.  But don't forget to come back because I have more to show you here.

First up is another card for this week's cue word CELEBRATE.    I had an idea for a embossed and water colored background.  It did NOT turn out how I imagined it would.


What was I thinking, right?  Well, I was able to salvage parts of this piece and made something I ended up really liking.


There must be a moral to the story....something about making lemonade out of my lemon of card stock.

I thought I would use this post to show how I organize all the cards I have made.  If you stop by here regularly, you know that I make a lot of cards.  I devised a system to organize my cards by theme, which makes it easy to find the cards I need when it is time to send them out.  It is also much easier for my friends and family to find what they are looking for when they come by to select cards for themselves.


I use bins from The Container store called Frosted Totes to hold all my cards.  The bins are stored in a shoe rack I got from Target.  The entire set up fits underneath the table where I keep my Big Shot, scoring board and paper cutter.

Each bin has a label on the front, indicating what type of cards are stored inside.  I actually have two bins for birthday cards.


I made dividers using a piece of Michaels card stock and a piece of colored card stock cut with a Half and Half Die and stamped with an appropriate sentiment.  Within birthday, I have belated, masculine, juvenile, and general.


Most of my bins have cards covering multiple themes.  I used a sentiment stamp on the bin's label as well as on the divider.


So, for example, this bin has cards that are blank (no sentiment), suitable for a cancer patient, get well, missing you, etc.


I like to stamp some sort of handmade by sentiment on the back of each card, and add my initials.


To save space, I do not store any envelopes with my cards, unless I have stamped or decorated the envelope, in which case I keep it with its matching card.

My bins are not all full yet, and I do have room for one more bin, so I have some room to grow with this system.  If you are interested in how I organize some of my other supplies, you can click here to see all my posts on organization.  Sometimes I think that I like organizing my supplies almost as much as I like using them.

A Give Away  It wouldn't be a celebration without a give away, would it?  Please leave me a comment with an organizational tip and you will have a chance to win this stamp set from Flourishes.


http://shop.flourishes.org/Call_Me_p/ss239.htm


This contest will run until 8AM Central Time on Thursday, 6/19.

Edited to add:  Congratulations to Lilian YF who is the winner of this Flourishes stamp set.  Big thanks to everyone who commented and left me an organizational tip.  I have seen quite a few good tips that I will be using in the future.


Thanks for Visiting

Friday, June 28, 2013

Moxie Fab Tuesday Trigger


I'm here today with a card for this week's Moxie Fab Tuesday Trigger:  Scene in Tangerine.  I was inspired by the colors, the rick rack, and the embroidery floss.  I was dying to use my brand new Lil Inker's Fanfare die, so it is probably no surprise that when I saw the rick rack I immediately thought 'FANFARE'.  I am also entering this card into this week's Simon Says...Anything Goes challenge.


Have you jumped on the sequins bandwagon yet?  I have, and in a big way.  I have joined forces with a few friends and split lots of sequin colors from just about every place who is selling them.  Here is what I just got at Michaels to help me organize them.


I love that these little containers all nest together and then fit in a small, flat case.  Just between you and me, I need another one, as I still have a few more colors to put away.  The best part--I got this at Michaels in the beads department, and it cost $5.60 with a coupon.  Can't beat that.


Supplies Used:
Stamps:  Framed Out
Paper:  PTI: Lemon Tart, Harvest Gold, Summer Sunrise, Limeade Ice, White, SU Green Galore, MFT Orange Fizz
Ink:  MFT Orange Fizz
Other:  Lil Inkers Fanfare Scalloped Border Die, PTI Tremendous Tags, DMC Floss


Thanks for Visiting

Sunday, March 10, 2013

CAS-ual Fridays 93, OLW 130 and some Crafty Organization


It seems like forever since I have posted just a card or two, but that is what I have to show for myself this weekend.  I spent a lot of my crafty time getting organized, and I will show some pictures of what I did.


First up is a card for this week's CAS-ual Fridays CFC93:  Color Blocks challenge.  When I saw this card by Erin Lincoln this morning, I knew I wanted to do something with color blocked flags.  I am also entering this into Simon Says Stamp:  Bit O Green.


Next is my entry into this week's One Layer Wednesday OLW130, where the challenge is to use a centered sentiment on a one layer card, and make the sentiment the star of the show.  We are allowed to add some minimal other stamping, and I chose to highlight my sentiment with just one pale stamp of aqua mist from Watercolor Wonder.  I also used the Canvas/Linen Impression plate, and embossed the sentiment with a Spellbinders Label die.


And, now some pictures from my craft room.  I have been working to organize my dies--I previously had them in hanging CD folders in a CD box, but I had filled 3 boxes, and found that solution wasn't working for me any more--it took up too much space, and did not accommodate my taller dies.

I have Kim to thank for this solution.  She led me to these drawer organizers at The Container Store, and I got two of the medium size for $8.99 each.   And, then she showed me these CD envelopes on Amazon, where I got 1,000 envelopes for $16.80.  I printed labels on my computer, and got all my dies stored and organized, sorted by company and alphabetized.  I used the top part of a Half & Half die cut to create my tabs.  I am really happy with this system so far--my dies are easy to find, take up less space to store, and I didn't spend too much on organizing supplies (more money for stamps!)


Here is what the dies look like in their labeled envelopes.  Those purple things on the right are placeholders I made out of cardboard and old scrapbook paper.  When I pull a die envelope out, I mark it's place with a placeholder, and then it is a bit quicker to put the die away when I am done.


I've already shown this photo before--this is how I store my tall, thin border dies.


I saw a post on Damask Love the other day about organizing patterned paper, and that gave me the idea to organize my patterned paper pads by manufacturer.  I still don't have a great solution for all the little scraps, but at least the pads are under control. 


Another organizational tip from Damask Love was her ideas on paper scraps.  I am a huge saver of paper scraps, and I find that I use them all the time, especially for die cutting.  I have been keeping all my scraps in hanging folders by color--you can see the cart I bought at The Container Store in this post.  But, the scraps for my neutral colors were really out of control.  I read this post on Damask Love and made my own little scrap storage containers out of old PTI clear stamp boxes.


I am lucky that my office has lots of built in shelves and drawers.  I am slowly converting them all to craft storage.  Here is a view of the part I have been working on.


Supplies Used (PTI):
Happy
Stamps:  Pretty Peonies, Wonderfully Whimsical
Paper:  White, Ripe Avocado, Limeade Ice, Raspberry Fizz, Hibiscus Burst, Hawaiian Shores, Aqua Mist
Ink:  Ripe Avocado, Hawaiian Shores, Versacolor Opera Pink
Other:  Pretty Peonies die, MFT Flag die, Kaiser Rhinestone

Rest
Stamps:  Sentiment Signs, Watercolor Wonder
Paper:  White
Ink:  Versafine Onyx Black
Other:  Spellbinders Label die, Canvas/Linen Impression Plate


Thanks for Visiting
Related Posts Plugin for WordPress, Blogger...